Expanding a Windows installation properly
I recently got a Windows 11 ARM VM running in the VMware Fusion Tech Preview after seeing the news about VMWare SVGA 3D acceleration on ARM Windows guests. Got the ISO off my NAS, copied onto my MBP, stuck it into VMware, did the installation and all.
The good people over at VMware apparently thought that two CPU cores, 4GB RAM and a 64GB virtual disk are good choices for Windows 11, so when I tried to do anything of consequence those specs quickly became an issue. CPU and RAM allocation is changed with just a few clicks in VMware, but the size of the virtual disk?
If you head into the VM's settings then navigate into the Hard Disk section, there's options for the size of the virtual disk which you can change, and it will actually change the size of the virtual disk, but there's a little more to this process than most people realize.
Filling the new free space
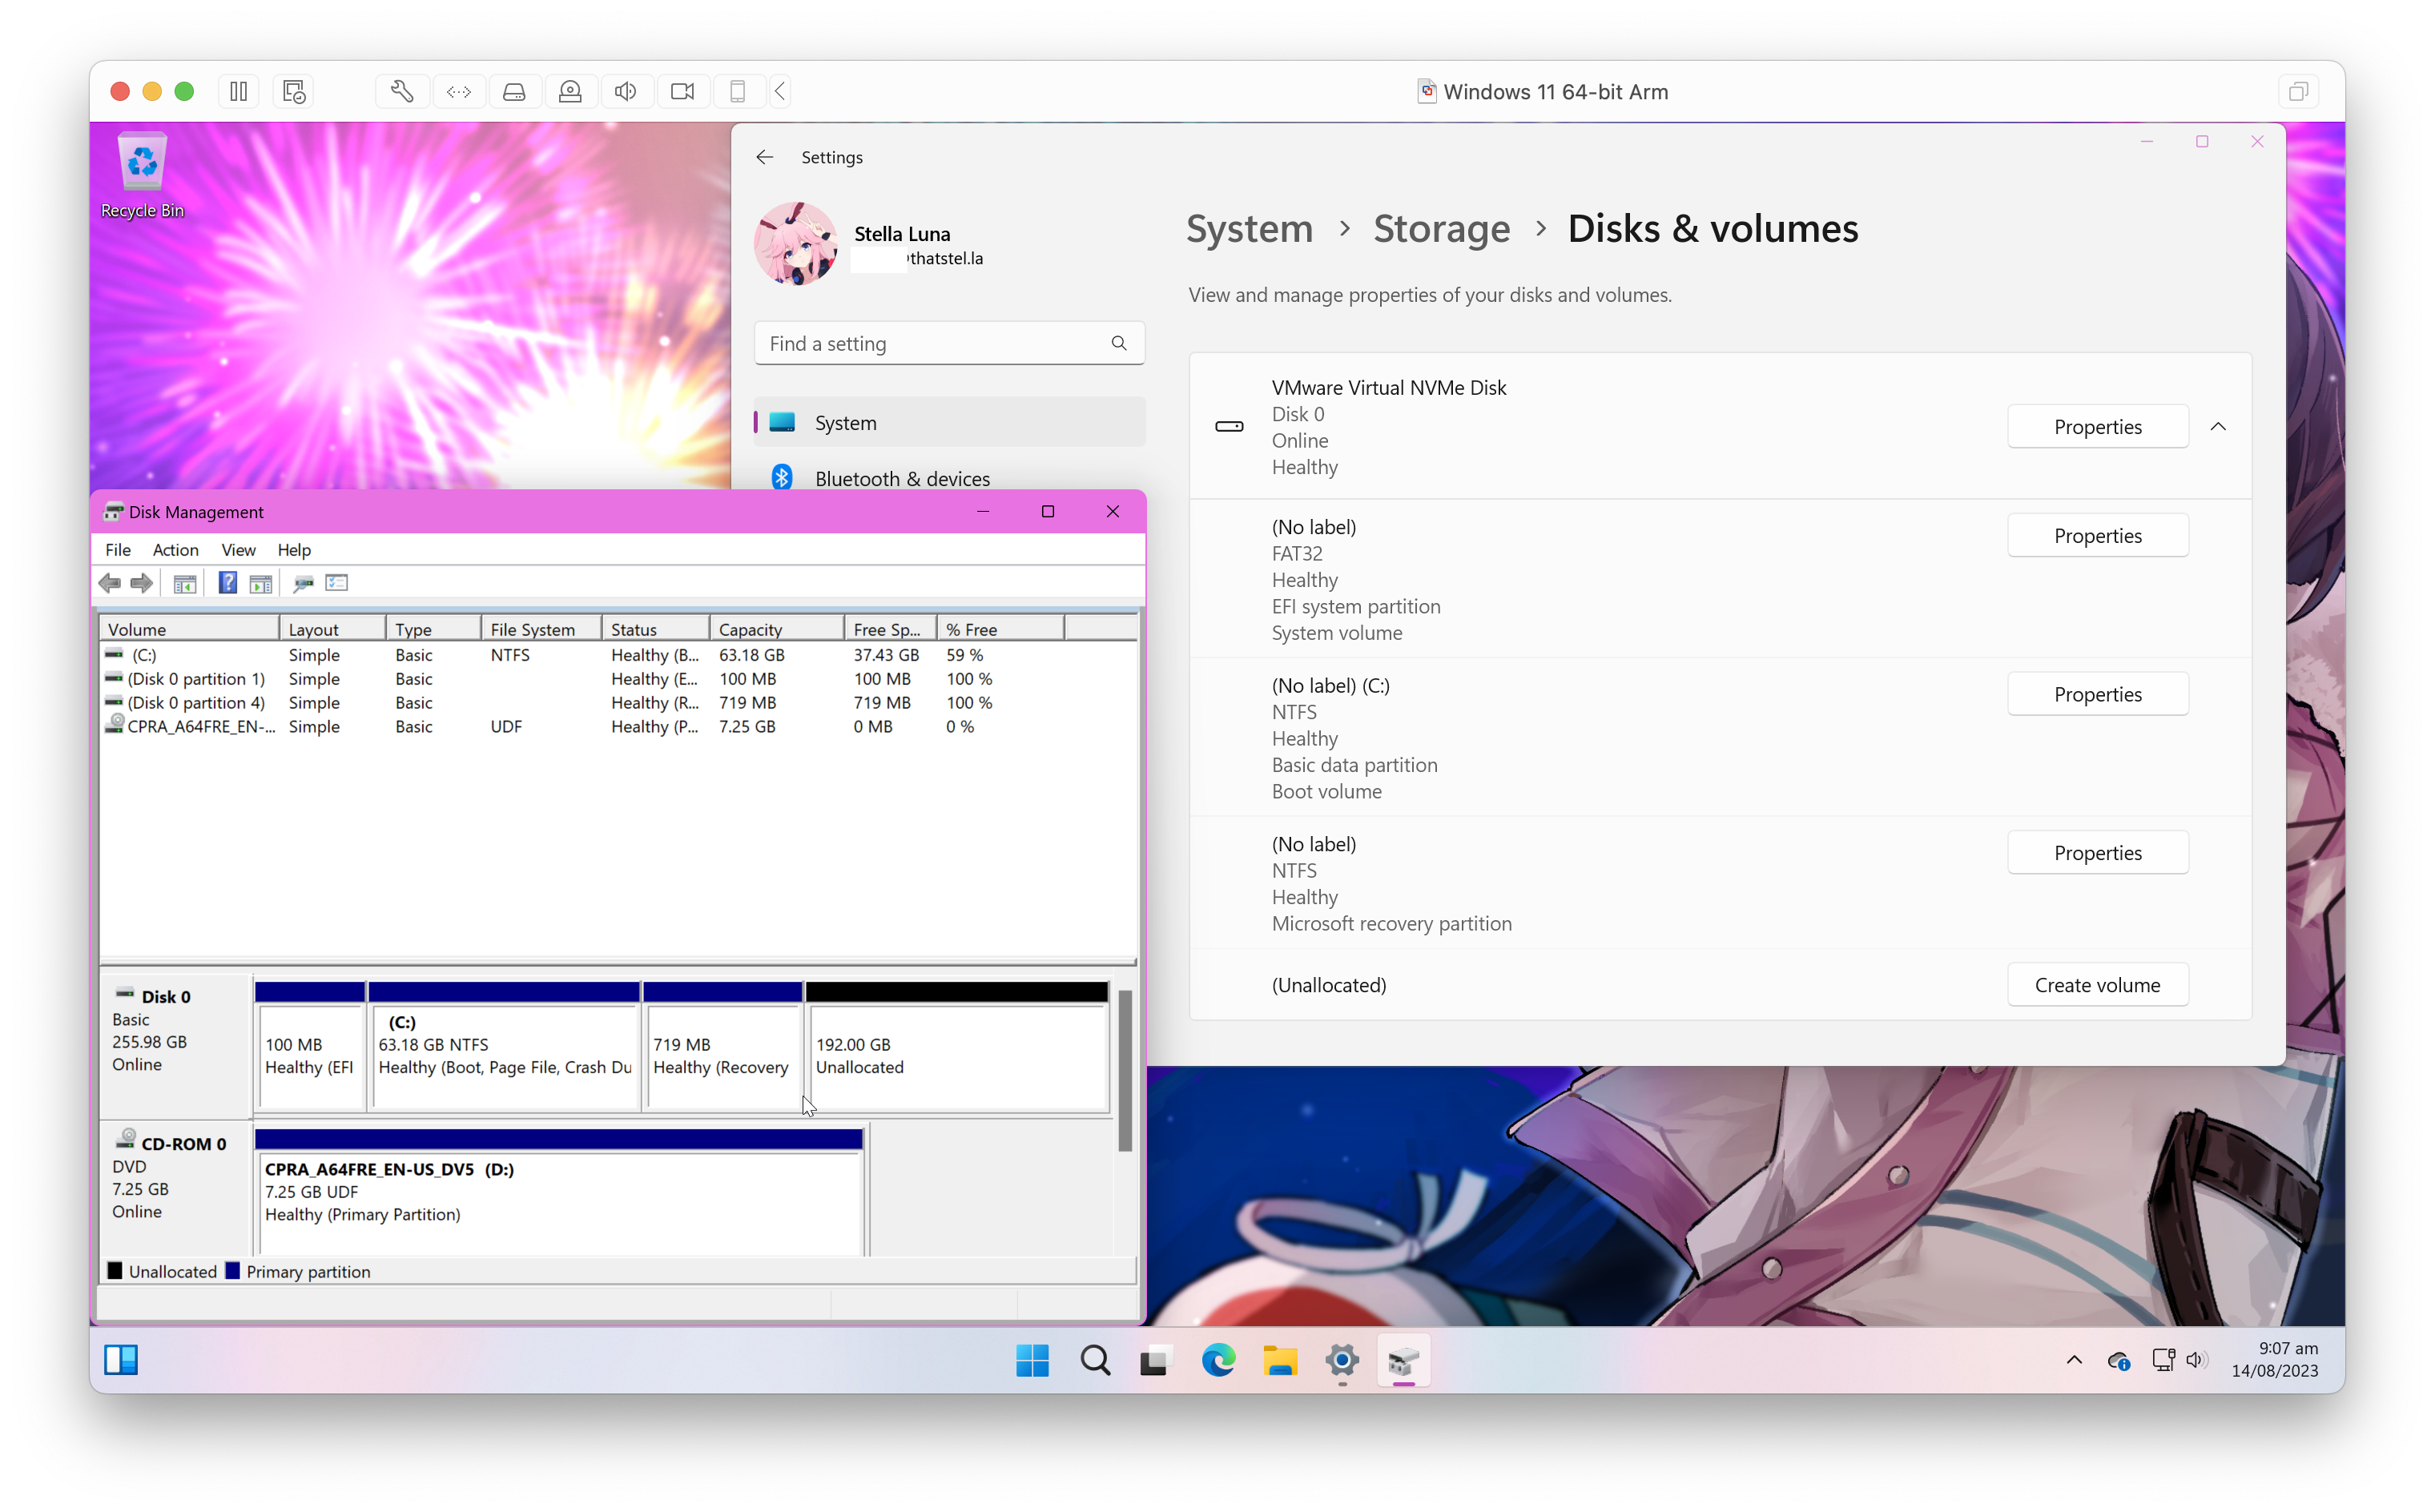 Once the disk is resized and you reboot, you'll notice that the partitions on the disk don't magically expand to fill the available space, because that's not how disk resizing works. In the screenshot, you can see the unallocated space in both the Windows Settings app and the legacy Disk Management, and you might wonder how to even fill that unallocated space.
Windows Partition Layout
This requires a little primer on how Windows installs work, so I'll get it over with quickly.
A common Windows installation on UEFI will essentially require four parititons on disk:
- the EFI System Partition (ESP)
- This partition contains the Windows Boot Manager as well as other things like the Boot Configuration Data which stores boot options for the Windows installs you may have
- No defined size requirement, but 200MB is a safe bet.
- the Microsoft Reserved partition (MSR)
- This parition is a bit of a weird one, from my poking around it seems to be designed for Windows to do whatever with
- Should be 16MB in size on Windows 10 and later
- the Microsoft Basic Data partition
- This'll usually be where Windows is actually installed and where your files are stored
- Should be NTFS and can be pretty much any size
- the Microsoft Recovery partition (WinRE)
- This partition stores the Windows Recovery Environment (WinRE) which Windows will use to fix common boot problems with itself
- Should be NTFS and can be any size, but is usually ~750MB on a stock Windows installation (no OEM customization)
As you can see, the WinRE partition (4) is at the end of the partition layout which stops the basic data partition (3) from being expanded. What I'd normally do is use a third party disk partitioning tool to move the WinRE partition and then expand the basic data one, but that isn't an option here because you can't use third party disk partitioning tools on Windows, at least the ones I've tried. They just crash silently, probably because of a driver incompatibility (no x86_64 drivers on ARM64 Windows) or missing APIs, leaving me to figure out how to do this completely natively in Windows without any external tools.
Process
I did some digging, and here's the process I ended up working out:
- Disable WinRE
- Assign a drive letter to the WinRE partition
- Image the WinRE partition then delete it
- Grow the basic data partition
- Create a new WinRE partition, then restore its contents from the image
- Re-configure and re-enable WinRE
Sounds like a lot, but it's really not that bad.
To get started, you'll need an administrator command prompt and the steps below.
- Disable WinRE by running
reagentc /disable - Enter
diskpart, then uselist diskto list the disks present. Select the one where Windows is installed withselect disk x(x is the disk number) - Use
list partitionto view the partitions on the disk. You're looking for a partition with type of Recovery and a size of around 750MB. Select it withselect partition xwhere x is the partition number - Once the Recovery partition is selected, run
assign letter=rto assign it toR:\
Now you have a drive letter assigned to the Recovery partition which you can now use to image the Recovery partition.
- Exit
diskpartby just typingexitand you should be dropped back at the command prompt - Run the below command. The command images
R:\and saves the.wimto your Desktopdism /capture-image /imagefile:%USERPROFILE%\Desktop\winre.wim /capturedir:R:\ /name:"Recovery"
With an image of the Recovery partition saved, you can now delete the old partition and create a new one:
- Enter
diskpartagain once the image saves successfully - Follow steps 1-2 again to select the Recovery partition, and take note of the Size of the partition. Now run
delete partitionto remove the partition list partitionagain to show the new partition layout, then select the partition with type Primary. It'll typically be the biggest one in the list- Run
extendto expand the basic data partition, then make room for WinRE by runningshrink minimum=x, where x is the size of the Recovery partition earlier (so if it was 768MB, runshrink minimum=768) - Run the below commands. The commands create a partition with the proper type for a WinRE partition, then protect it and prevent it from being given a drive letter automatically
create partition primary id=de94bba4-06d1-4d40-a16a-bfd50179d6acgpt attributes=0x8000000000000001
- Assign a letter to the partition with
assign letter=g, then format it withformat fs=ntfs quick - You can now exit
diskpartagain by usingexit
With all that done, you now restore the image of the Recovery partition
- Run
dism /apply-image /imagefile:%USERPROFILE%\Desktop\winre.wim /index:1 /applydir:G:\ - Set the new partition to be used for WinRE by running
reagentc /setreimage /path G:\Recovery\WindowsREand enable it withreagentc /enable
Done
Once that's done, your Windows partition has now been resized and WinRE was kept intact while doing it. You should now reboot to clear any drive letter assignments that were made, and optionally test WinRE.
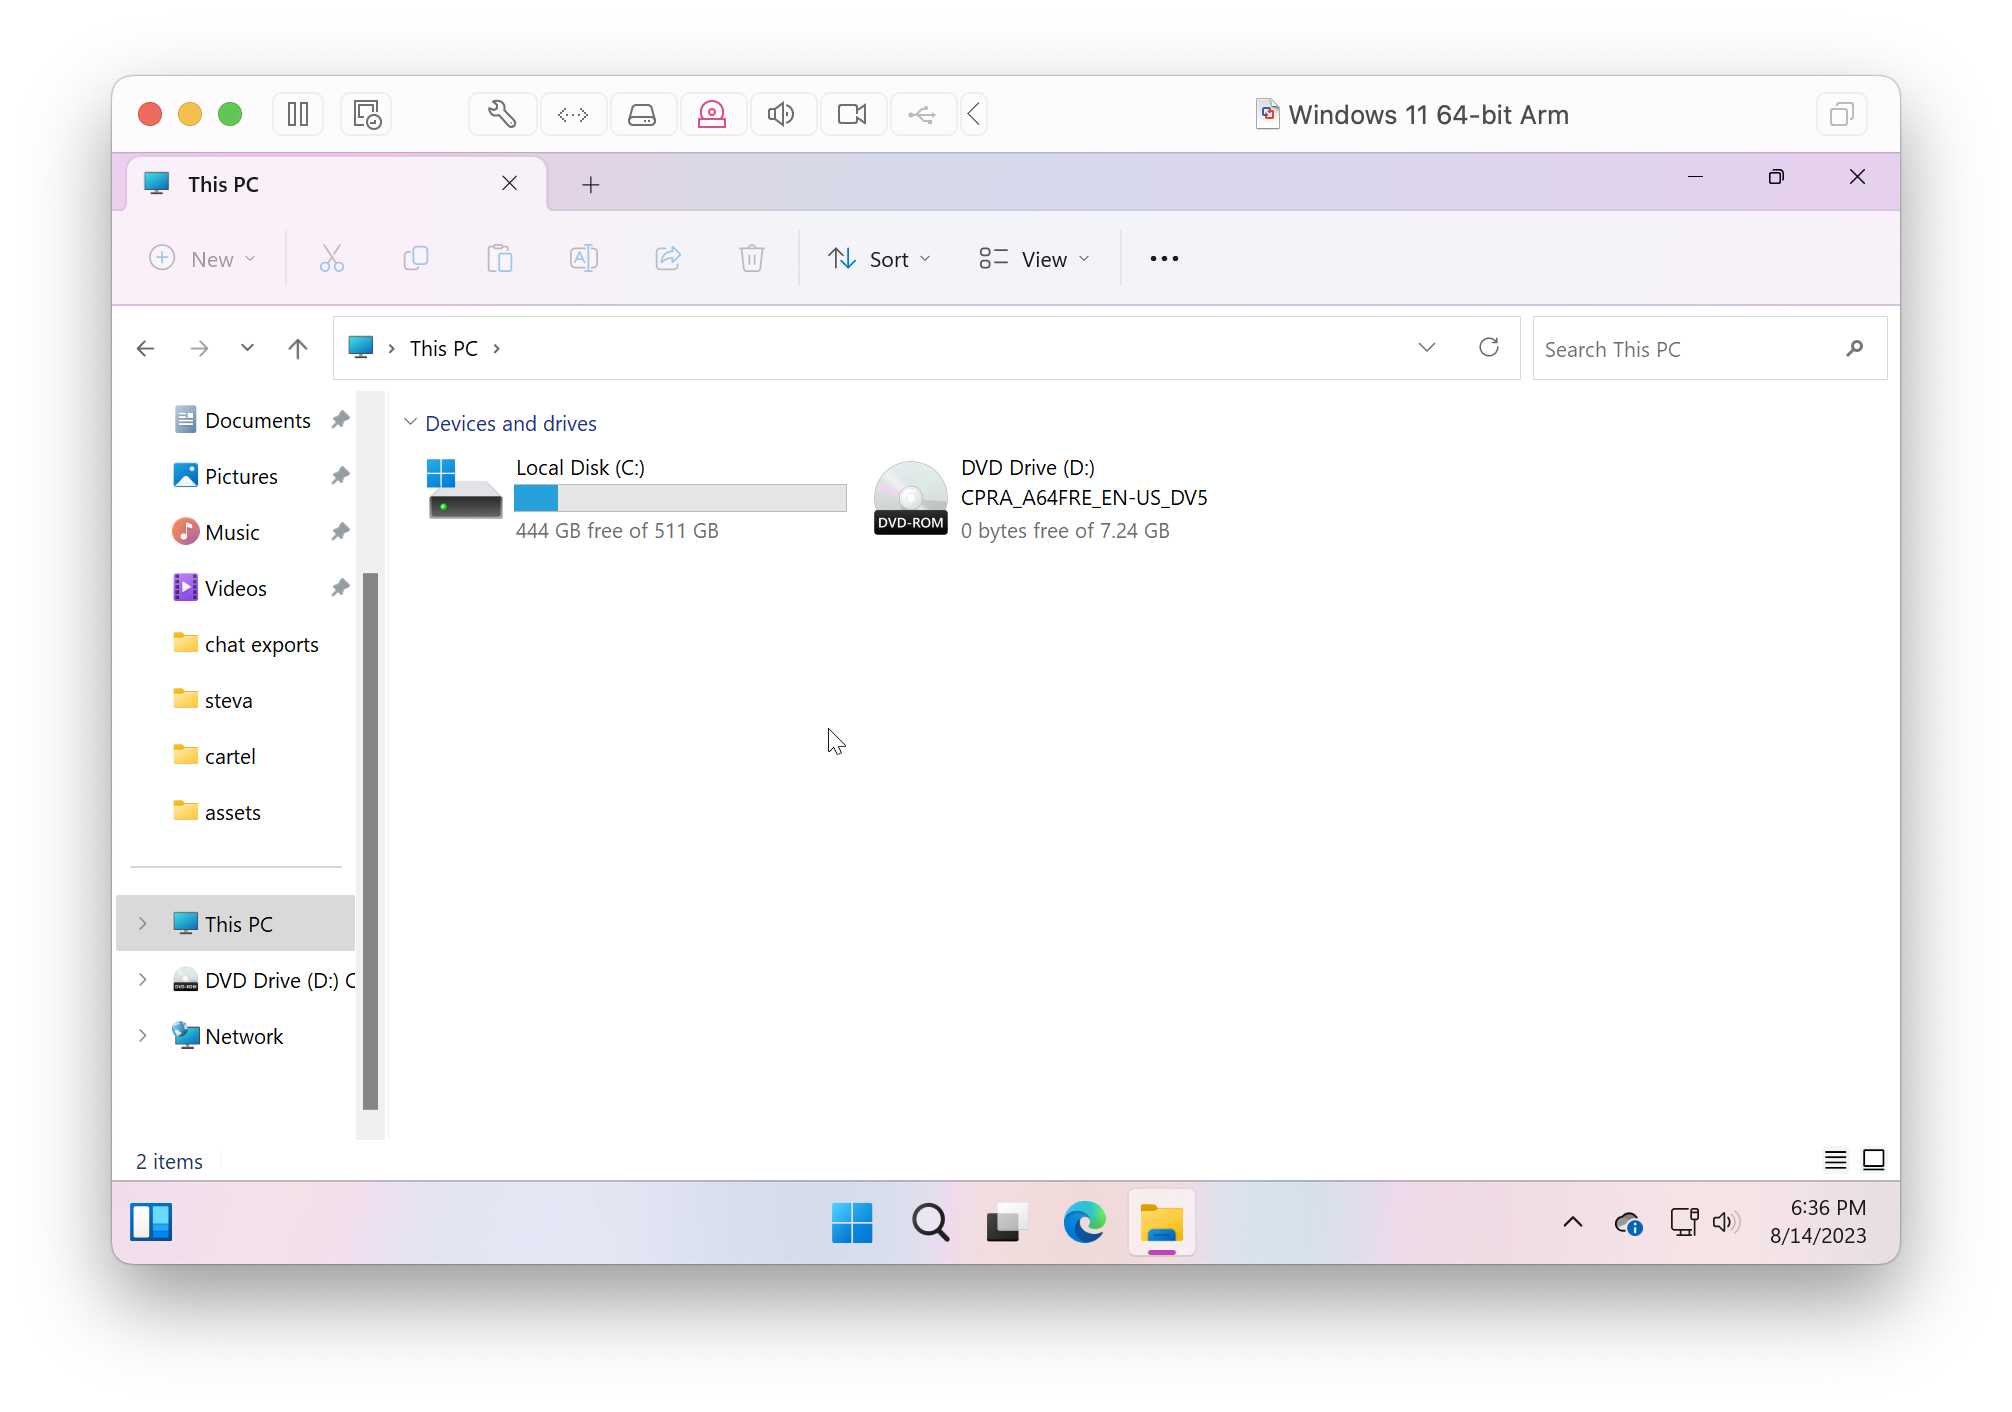 Windows install I resized from 256GB to 512GB
Info used:
- https://learn.microsoft.com/en-us/windows-hardware/manufacture/desktop/oem-deployment-of-windows-desktop-editions-sample-scripts
- https://learn.microsoft.com/en-us/windows-hardware/manufacture/desktop/capture-and-apply-windows-system-and-recovery-partitions
- https://learn.microsoft.com/en-us/windows-hardware/manufacture/desktop/windows-recovery-environment--windows-re--technical-reference
- https://learn.microsoft.com/en-us/windows-hardware/manufacture/desktop/reagentc-command-line-options
- https://learn.microsoft.com/en-us/windows-server/administration/windows-commands/diskpart
- https://learn.microsoft.com/en-us/windows-hardware/manufacture/desktop/dism-image-management-command-line-options-s14